
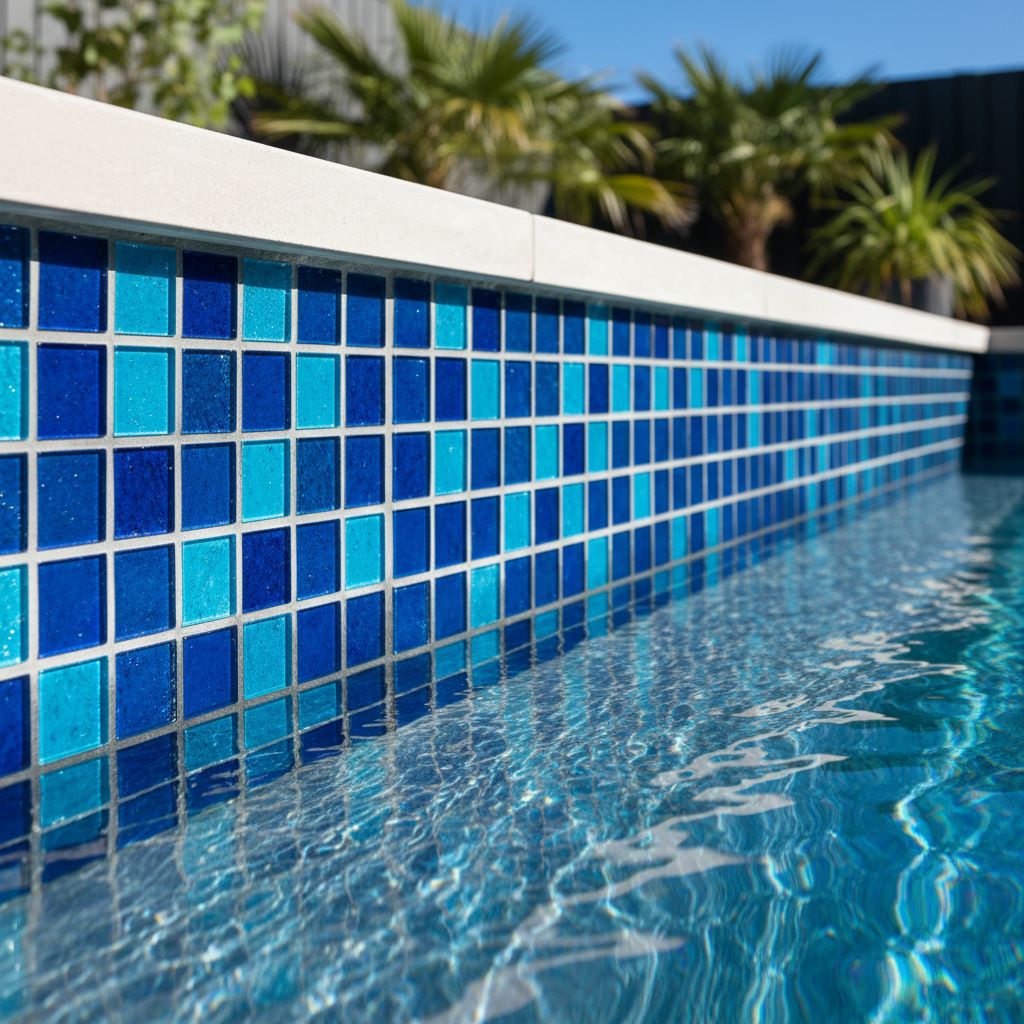
Separate coping, waterline tiles and the interior finish
Coping is the cap at the pool edge. Waterline tiles are the band on the inside wall around the usual water level. The interior finish continues below that band, while the surrounding paving lies outside the pool. These surfaces meet, but a defect in one does not automatically mean all of them need replacement. Ask the contractor to identify the affected part on a photo before discussing materials or the size of the renovation.
Describe what you can observe without trying to diagnose it. A tile is missing, an edge is chipped, a joint has opened or a coping unit moves when someone steps nearby. Those observations are more useful than calling every defect a leak or structural failure. If there are loose or sharp pieces, keep people away from the affected area and arrange an assessment. Do not lift coping or chip tiles off to make the inspection easier.
For an older Berwick pool, look for previous repair records and spare tiles before booking a materials discussion. If the house changed hands, the original finish name may be unknown. Say so rather than guessing from a colour. A contractor can compare the existing assembly and samples, but a photograph alone may not identify the exact product or the condition of what is underneath it.
Map the damage before asking for a patch price
Take an overall photo of each affected side and a closer image showing the defect with an ordinary object for scale. Keep the coping, waterline and nearby paving visible where possible. Note whether the problem is at a corner, along a straight run, near steps or beside a previously repaired area. A series of well-oriented photos is easier to assess than several tight close-ups with no indication of where they belong.
Record when you first noticed the issue and whether the appearance has changed. Include any known recent work around the pool, such as paving replacement, a new fence or a changed garden bed. This does not establish the cause, but it helps the contractor ask better questions. If you have noticed unexplained water loss as well, flag it separately and read the water-loss guide rather than assuming the missing tile explains everything.
Ask the inspecting contractor to distinguish what is visible from what will only be known after controlled removal. A small missing section can be straightforward, or it can be the visible edge of a larger preparation problem. The quote should explain that uncertainty. You do not need a prediction that nothing unexpected will appear; you need a clear process for inspecting, documenting and approving any extension of the repair.
Ask why the joint or tile failed before covering it again
The junction between a pool shell and its surrounding construction needs particular attention. ARDEX's pool-coping technical bulletin explains the problems with rigidly bridging the shell-to-surround boundary and the role of movement-joint detailing. Ask the contractor to identify the relevant junction in your pool and explain how the proposed repair accommodates it. New adhesive alone is not an explanation of the repair design.
Request the proposed material system in writing, including the substrate preparation, adhesive, grout and any flexible joint products. Those products need to be suitable for the actual location and pool construction. This is especially important if the repair meets several different materials. You do not need to choose a chemical system yourself; you need the person doing the work to specify a compatible one and take responsibility for its use.
A useful inspection conversation separates appearance from cause. You may dislike the colour of an old joint even though it is functioning, or like a neat uninterrupted tile line that hides an unresolved junction. Ask what can be changed for appearance and what needs to remain for the repair to work. If the proposed design changes the visible joint pattern, have that shown on a sample or marked-up photo before agreeing.
Decide whether a patch can look deliberate
Compare replacement samples beside the pool in both dry and wet conditions. Look at thickness, edge profile, surface texture and joint spacing as well as colour. A close colour match can still look wrong if the new unit has a different rounded edge or sits at a different level. Ask the contractor to show how the transition will be finished rather than judging a loose sample on a showroom table.
If original stock is unavailable, compare a local patch with replacing a complete defined band. A band might follow one side, the full waterline or the coping perimeter, depending on the problem and design. It should have an intentional boundary. Ask for a marked-up plan of each option so you can see where the old and new materials meet and what will remain visibly different.
Keep appearance decisions separate from an assessment of soundness. Replacing an entire waterline band may create a consistent look, but it does not necessarily require renewing a sound interior below it. Conversely, a matching spare tile does not make a patch sufficient if the surrounding material is failing. Ask for the reason behind the repair area first, then choose the finish within that area.
Set a repair boundary that can be inspected and priced
| Possible scope | What needs to be established |
|---|---|
| Local tile or coping repair | The surrounding material is suitable to retain and a workable transition is agreed. |
| Replace a complete edge or band | The extent is defined, replacement stock is selected and junctions are detailed. |
| Broader renovation | Separate evidence supports work to the interior, structure or other components. |
Have the quote distinguish investigation, removal, preparation and reinstatement. Ask how additional defects found after removal will be photographed and approved. A provisional allowance should describe what it covers rather than acting as an unexplained buffer. If there is a point at which a small repair becomes uneconomic, ask the contractor to explain that decision before starting so you can choose how to proceed.
Identify nearby items that could be affected: pool lights, skimmer openings, cover attachments, glass-fence fittings and planted edges. Ask who protects them and who handles any work outside the tiling scope. A coping repair should not leave uncertainty about a fence fitting that needs moving. Any barrier implications need assessment by the appropriate professional; do not assume that putting everything back in roughly the same place is sufficient.
For Casey homeowners coordinating a broader garden renovation, settle the pool-edge details before ordering adjoining paving. The tile modules, levels and joint positions need to be considered together. Ask the pool contractor and paving contractor to work from the same agreed detail. Otherwise, each may finish their own area neatly while leaving an awkward or unresolved strip where their work meets.
Ask the contractor to number the proposed repair areas on a photograph. For each number, record the material being removed, the material retained and the intended finish. That is especially helpful when one side needs a local coping repair but a different side needs waterline work. A single description such as repair pool tiles can conceal those distinctions. Numbered areas also make it easier to compare quotes from contractors who otherwise describe the extent of work differently.
Before choosing a larger replacement band purely for matching, ask what happens at fittings and corners. A new tile size may change the cuts around a skimmer or the pattern at a curved end. Have the contractor show the proposed set-out at the most visible point. You can then decide whether to centre the pattern on the house outlook, follow an existing joint line or use a defined transition, subject to the required technical detailing.
Let the contractor control water levels and return to use
Do not drain or lower the pool in preparation unless the responsible pool professional has assessed it and given specific instructions. Tell the contractor about known drainage issues, previous structural repairs and any history of water entering the equipment or pool area. Ask who makes the water-level decision, who carries it out and what conditions would postpone the work. A convenient date is not a substitute for that assessment.
Ask for a sequence that includes preparation, material application, curing and the point at which water or swimmers can return. Those instructions depend on the selected system and site conditions. ARDEX's pool-surround guidance highlights the importance of material selection, joints and product-specific technical advice. Keep the exact instructions with the quote rather than relying on a generic promise of a quick turnaround.
Before the work is covered, ask for photographs of the prepared area and the repair stages the contractor can reasonably document. At completion, walk the boundary of old and new work together. Confirm the agreed finish and collect care instructions, product details and warranty information. Keep spare material if supplied, labelled with the product reference. That small record can make a later isolated repair easier to match.
Questions about coping and waterline repairs
Does missing grout mean the whole pool needs resurfacing?
It does not establish that conclusion on its own. Ask for an assessment of the affected joint, adjacent tiles and underlying condition. The recommended work should follow the findings. If whole-pool resurfacing is proposed, request a separate explanation of the interior defects that justify it. The resurfacing guide covers finish choices once that broader scope has been established.
Can new coping simply be laid over the old edge?
Do not assume an overlay is suitable. Ask the contractor to assess the existing assembly, the resulting levels and the junctions with the pool and paving. Request a detail showing what remains and what changes. If the reason offered is only that an overlay avoids removal, the technical and practical questions still need answering before it can be compared fairly with replacement.
What if the repaired section cannot be made invisible?
Choose the acceptable visual result before work begins. A defined contrasting band can be easier to understand than a patch that nearly matches but draws attention to itself. Ask to see samples in place and a sketch of the boundary. Record whether the priority is retaining as much sound material as possible or achieving a uniform appearance, because those priorities can lead to different scopes.